


How to Make Tobiko Sushi at Home (The Malosol Roll)

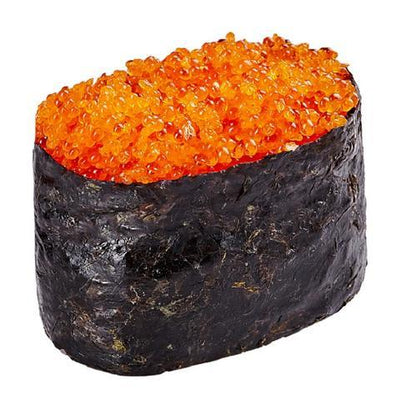
Tobiko sushi is the kind of roll that stops people at the table. The outer layer of bright orange flying fish roe catches the light before a single piece is lifted with chopsticks. It looks like something reserved for restaurants. It feels like craft that takes years to develop. The truth is that the technique is more approachable than it appears, and the results are deeply satisfying when you understand exactly what you are doing and why each step matters.
At Caviar Malosol, we work with roe every day. We know how each variety behaves, how it holds, how it responds to temperature and handling, and what it needs to perform at its best. That knowledge informs this recipe. The Malosol Roll is our own take on the tobiko sushi inside-out roll: salmon and avocado as the base, a touch of yuzu kosho for a clean citrus heat that lifts the brine of the roe, toasted sesame seeds pressed under the tobiko coat for a second layer of crunch, and orange flying fish roe covering every surface of the finished roll. It is a recipe we have refined to be genuinely achievable at home without cutting corners on the result.
Before you start rolling, it is worth understanding tobiko itself. What it is, where it comes from, and how its different colors and flavors work will help you make better decisions throughout this recipe and in every tobiko dish you prepare afterward.
What Is Tobiko?
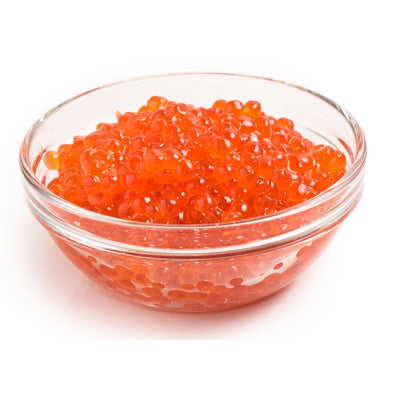
Tobiko is the Japanese word for the roe of the flying fish. The eggs are small and round, typically ranging from 0.5 to 0.8 millimeters in diameter, and naturally orange in color. They have a delicate outer shell that gives a light, satisfying crunch when eaten, and a mild flavor that is simultaneously briny, slightly sweet, and faintly smoky. That combination makes tobiko one of the most versatile sushi ingredients in professional kitchens, working as both a coating for rolls and a standalone topping for nigiri.
Tobiko is not the same as masago, though the two are frequently confused. Masago comes from the capelin fish, is slightly smaller than tobiko, and carries a milder, less complex flavor profile. Tobiko is the more prized ingredient in Japanese cuisine, with a firmer pop, a more pronounced taste, and a higher price point. For this recipe, tobiko is the correct choice. Its texture and volume are what give the finished roll its visual impact and satisfying bite.
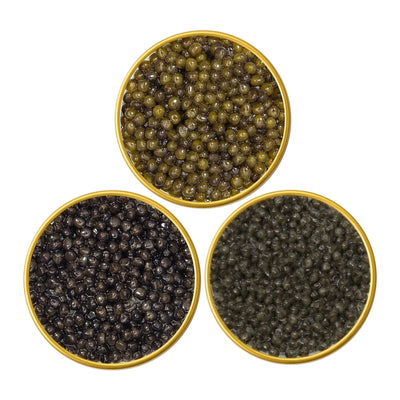
One of tobiko's most useful properties is its ability to absorb color from natural ingredients without losing its flavor. This is why you find it in multiple colors at quality sushi bars, and why each variety carries a subtly different taste.
Tobiko Colors and What They Mean
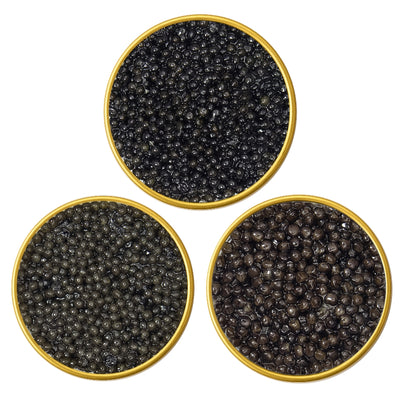
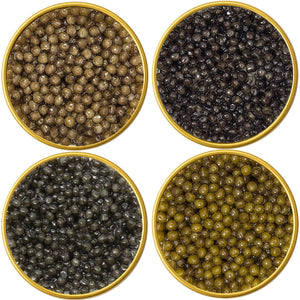
The color of tobiko is always a signal about flavor, not just appearance. Professional sushi chefs select the color intentionally based on what they want to add to the dish. For this recipe, orange tobiko is the standard choice. It is the natural, unaltered roe with the cleanest, most balanced flavor. The other varieties are worth knowing, both for creative experimentation and for understanding what you are ordering when you see them on a menu.
| Color | Natural dye source | Flavor note |
|---|---|---|
| Orange | Natural, unaltered | Mild brine, lightly sweet, classic tobiko flavor |
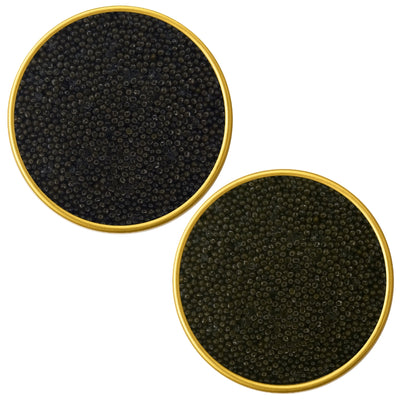
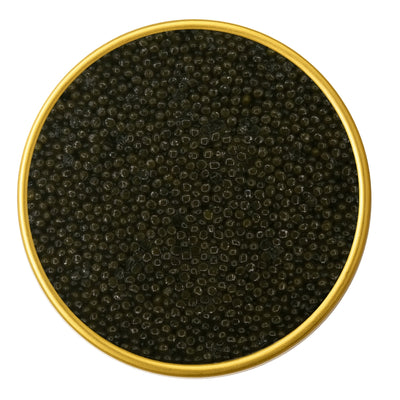
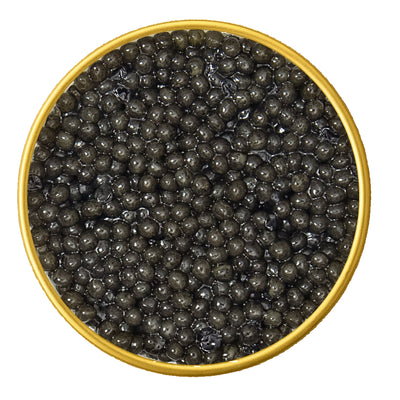
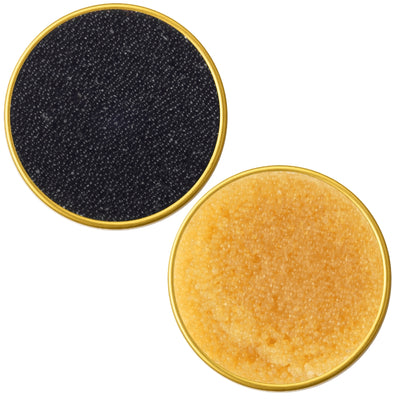
| Black | Squid ink | Deeper, earthier, slightly more savory |
| Red | Beet juice | Mild sweetness, subtle earthiness |
| Green | Wasabi | A clean heat that builds gradually on the palate |
| Yellow / Gold | Yuzu or other citrus | Bright citrus lift, aromatic and delicate |
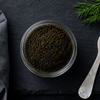
All five colors use the same flying fish roe as the base. The dyeing process uses only natural ingredients, so no artificial colorings are involved in quality tobiko. When plating a finished tobiko roll, the choice of serving surface matters more than most people realize. A dark plate, black or deep charcoal, sets off the vivid orange roe in a way that a white or neutral surface simply does not. That contrast is part of what makes tobiko sushi feel genuinely special at the table, and it costs nothing to get right.
The Malosol Tobiko Roll Recipe
Ingredients
- 100 g cooked, seasoned sushi rice (short-grain or medium-grain)
- 1 half sheet of nori seaweed
- 80 g sashimi-grade salmon, cut into strips
- Half a ripe avocado, peeled and sliced
- 3 to 4 tablespoons of tobiko (flying fish roe), orange or your preferred color
- 1 teaspoon yuzu kosho, for spreading inside the roll
- 1 tablespoon toasted sesame seeds, for pressing onto the rice before the tobiko coat
- A small amount of wasabi, for seasoning inside the roll
- Pickled ginger, for serving
- Soy sauce, for serving
- A small bowl of water mixed with rice vinegar, for your hands
Equipment
- Bamboo rolling mat (or plastic mat) wrapped in plastic wrap
- An extremely sharp knife
- A wet cloth for wiping the blade between cuts
- A rice paddle or wooden spoon

Step-by-Step Instructions
Step 1: Prepare the Sushi Rice
Sushi rice is the foundation of every roll, and it deserves more attention than most home cooks give it. Rinse your short-grain or medium-grain sushi rice under cold running water until the water runs nearly clear. This removes excess starch that would make the cooked rice gluey rather than tender and distinct. Cook according to package instructions, then transfer to a wide, shallow bowl while still hot.
In a small saucepan, warm rice vinegar with a little sugar and salt just until dissolved. Do not let it boil. Pour this mixture over the rice and fold it in gently using a cutting motion, fanning the rice as you go to cool it and coat each grain. The goal is rice that is just warm, slightly sticky, and seasoned all the way through. This seasoning is what gives sushi rice its characteristic flavor and keeps it from tasting flat against the tobiko and fish.
Step 2: Prepare the Salmon and Avocado
Take your sashimi-grade salmon and slice it lengthwise into strips roughly 0.5 cm thick. Always use a very sharp knife and draw it through the fish in one smooth, continuous motion rather than sawing back and forth. A clean cut preserves the texture of the fish and prevents ragged edges that would show in the finished roll. Set the strips aside.
For the avocado, cut it in half and remove the pit. Take the half you are using and peel the skin away cleanly. Then cut from the outside in around the circumference in even, circular slices. This circular cutting method produces pieces of roughly equal size, which makes assembly tidier and the final cross-section of the roll more visually consistent. Lay the avocado slices alongside the salmon and you are ready to build.
Step 3: Build the Inside-Out Roll
Place your plastic-wrapped rolling mat flat on a clean work surface. Lay half a sheet of nori on the mat, rough side facing up. Wet your hands with the vinegar-water mixture to prevent sticking. Take 100 g of your prepared sushi rice and spread it evenly and gently across the entire nori sheet, working from one edge to the other. The layer should be thin and consistent, not piled in the center. If you press too hard, the rice compacts and loses the light texture that makes the finished roll pleasant to eat.
Once the rice is spread, flip the nori sheet over so the rice is now facing down against the mat. This is the defining step of the inside-out roll. The nori now faces up, the rice is on the outside, and when the roll is finished the tobiko will coat that outer rice layer. Here is where our version diverges from a standard roll. Instead of wasabi alone, spread a thin smear of yuzu kosho down the center of the nori with the tip of a spoon. Yuzu kosho is a Japanese condiment made from yuzu citrus peel, chili, and salt, and it brings a clean, aromatic heat that works in perfect harmony with the brine of the tobiko. Use a small amount, it is more concentrated than wasabi and a little goes a long way. Lay your salmon strips across that center line, then arrange the avocado slices alongside them.

Step 4: Roll and Firm the Shape
Lift the near edge of the mat and fold it forward over the filling, tucking it under on the far side to begin the roll. Check for a small visible strip of nori when you lift the mat edge slightly. That strip tells you the roll has closed properly and the seam will hold. Roll forward firmly, applying even pressure across the width of the roll, and continue rolling until the seam is sealed underneath.
Once the roll is closed, roll it a couple of times in different directions inside the mat to firm and even out the shape. Then slide the roll to one side of the mat and use your fingers to tuck the two open ends in gently. This step is easy to skip, but it matters. Tucking the ends gives you cleaner, more presentable end pieces rather than loose, ragged ones that fall apart when cut. Transfer the roll to your board and give it one final gentle press to set the shape.
Step 5: Apply Sesame Seeds, Then Coat in Tobiko
Before the tobiko goes on, scatter a light, even layer of toasted sesame seeds across the outside of the rice. Press them in gently with your fingertips so they adhere. This is our addition to the standard tobiko roll, and it does two things: it adds a second layer of crunch beneath the tobiko that you notice clearly in the bite, and it gives the tobiko something slightly textured to grip, which helps it stay in place more consistently during cutting. The sesame flavor is quiet against the tobiko, it supports rather than competes.
Now apply the tobiko. Resist the instinct to spread it on a flat plate and roll the sushi through it. That method tends to produce an uneven coat with thin spots where the roll did not make firm contact. Instead, spoon the tobiko directly onto the roll. Apply it to the top surface, turn the roll over, apply more to the newly exposed side, and continue turning and spooning until every surface is fully covered. Use the back of the spoon or your fingertips to press the roe gently into the sesame-and-rice exterior so it bonds cleanly. The finished roll should be uniformly coated with no gaps, the orange roe bright and dense against the white rice beneath.

Step 6: Cut the Roll
Knife quality is where most home attempts unravel, and it is worth being direct about this. A dull knife does not just make cutting harder, it actively destroys the roll. A blunt blade tears through the tobiko coat, compresses the rice, and drags the filling out of position. There is no recovering a roll that has been badly cut. Use an extremely sharp knife, or take ten minutes to sharpen yours on a whetstone before you begin. A proper sushi knife is ideal, but any sharp, thin-bladed chef knife will work if it is maintained well.
Wet the blade and wipe it clean on a damp cloth before every single cut. This is not a suggestion. Rice and tobiko accumulate on the blade with each pass, and even one unwiped cut creates drag that compresses the roll unevenly. Cut straight down through the center first, then cut each half into quarters, and each quarter again to produce eight equal pieces. Wipe the blade between every cut without exception. When you have finished, use the mat to gently re-firm the shape of each piece, the pressure of cutting loosens the form slightly, and a few seconds with the mat restores it. Set the two end pieces aside. They are less uniform in shape and are best kept for the cook. The six center pieces go on the plate.
Plating and Serving
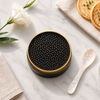
Presentation is part of what makes tobiko sushi worth making at home, and a few deliberate choices here lift the finished result considerably. Spread the six center pieces slightly apart on the mat after cutting so they separate cleanly without sticking to each other. Then arrange them in a neat, even row on a dark plate. A black or deep charcoal surface is the right choice for tobiko. The contrast between the dark plate and the vivid orange roe is what makes the roll look composed rather than simply plated. On a white or cream surface, the visual impact is halved.
Add a small mound of pickled ginger alongside the roll, a clean dash of wasabi, and soy sauce served in a small ramekin on the side. Each of these plays a specific role. The pickled ginger resets the palate between pieces so the tobiko reads as distinctly as it did on the first bite. The wasabi adds heat at the moment of eating, where it is most effective. The soy sauce, used sparingly and dipped rather than poured, deepens the umami of the salmon without washing out the delicate flavor of the roe. Resist the temptation to soak. The tobiko is the point of this roll, and it deserves to be tasted clearly.
Tobiko sushi is best eaten immediately after cutting and plating. The roe begins to lose its crunch as the moisture from the rice works into the outer shell, and the structural integrity of the roll softens within an hour. If you are making this for guests, time the cut and plate to no more than a few minutes before serving.
Tobiko Sushi Variations Worth Trying
The Malosol Roll format is deliberately versatile. Salmon and avocado are the starting point precisely because they accept variation without resistance. Once you are comfortable with the rolling and coating technique, the recipe becomes a framework for experimentation rather than a fixed instruction.
Swapping orange tobiko for green wasabi tobiko adds a slow-building heat to every bite that intensifies the effect of the yuzu kosho inside the roll. The two heat sources work in different registers, the yuzu kosho is aromatic and citrus-forward, the wasabi tobiko is sharper and more direct, and together they make the salmon taste richer by contrast. Black squid-ink tobiko is the most visually dramatic option, and it pairs particularly well with a milder filling like crab or shrimp if you want to move away from salmon. Red beet tobiko has a subtle sweetness that suits a roll built around cucumber and cream cheese, where the richness of the filling benefits from a lighter, less briny coating.
If rolling feels like too much of a commitment for a weeknight, tobiko nigiri is a worthwhile alternative. Form small, compact rice ovals by hand, apply a generous spoonful of tobiko directly on top, and finish with a raw quail egg yolk placed in the center of the roe. The yolk breaks when eaten and coats the tobiko and rice in a way that is unexpectedly rich and deeply satisfying. No mat, no rolling, no cutting required. The tobiko hand roll (temaki) is another option, nori shaped into a loose cone, filled with rice, salmon, and tobiko, and eaten immediately. Less precise, faster to make, and genuinely enjoyable.
Where to Source Tobiko and Sashimi-Grade Salmon
The quality of your ingredients determines the quality of your roll, and there is no technique that compensates for substandard tobiko or salmon that is not fresh enough to eat raw. This is a point we feel strongly about at Caviar Malosol, having spent over two decades sourcing and supplying premium roe to discerning buyers across the United States. The roe you use in this recipe matters as much as how you roll it.
Tobiko is best sourced frozen from a supplier who handles it correctly from the point of harvest. Properly frozen tobiko retains its texture, brine, and color with remarkable fidelity. Thaw only as much as you need, keep the rest sealed and frozen, and never refreeze tobiko that has already been thawed. Our sushi roe collection carries orange, black, red, and green tobiko, all sourced to the same standard we apply to our caviar line, and shipped directly to your door in insulated packaging designed to maintain cold chain integrity from dispatch to delivery.
For the salmon, sashimi-grade is not a marketing term, it describes fish that has been handled, stored, and in many cases frozen to a temperature that eliminates parasites, making it safe to consume raw. Your best local source is a Japanese fish market or a fishmonger who supplies restaurants directly. Buy it on the day you plan to use it, keep it cold until you are ready to slice, and do not substitute with supermarket salmon that has not been specifically designated as sashimi-grade. If you are new to sourcing roe and want to understand the full landscape before you shop, our guide to sushi roe types covers the key differences between masago, tobiko, and salmon roe in detail.
Roll It Once, Understand It Forever
The thing that separates a tobiko sushi roll that looks considered from one that looks rushed is not any single step. It is the accumulation of small decisions made consistently throughout the process. The rice weight measured precisely. The avocado sliced in even circles rather than rough chunks. The ends of the roll tucked before the mat comes off. The knife wiped between every cut without exception. The tobiko applied with a spoon and pressed in, not rolled through a plate. None of these is technically demanding. All of them are easy to skip when you are moving quickly, and all of them are visible in the finished result.
We built the Malosol Roll to be made at home with ingredients that are genuinely accessible, and techniques that are genuinely learnable. The yuzu kosho and sesame seed additions are not there to complicate the recipe. They are there because they make it distinctly better, the citrus heat of the yuzu kosho lifts the brine of the tobiko in a way that plain wasabi does not, and the sesame layer under the roe coat adds a dimension of texture that makes the bite more interesting without competing with the flying fish roe for attention. Make it once and you will understand immediately why both are worth including. Make it a second time and the entire process will feel considerably more natural. That is the honest trajectory of learning to roll sushi well, and it is a skill that pays off every time you use it. When you are ready to get started, you can find our full range of tobiko and sushi roe in the store, ready to ship.


)